Showing posts with label Fundación Nueva Tamsweg. Show all posts

Tuesday, September 24, 2024

Priorities - or - short term vs long term thinking

With a daily wage of 20$ for 8 hours of hard work in the sun, the three top priorities of locals when building a house are how much it costs, how much they have to pay for it, and how much money is needed. The rest is pretty much irrelevant!

I am not swimming in money myself, but, I am able to consider other factors and arrange priorities a little differently with our house.

My thought is, construction of the house is taking a few months. But you’ll live in it many, many years. So, if you make the construction easier and cheaper, you get the benefit during these few months while building. If, however, you make maintainability and adjustability a higher priority, you reap the benefits for all the years you live there.

Of course, a company who builds homes to sell, doesn’t care about anything after the sale. But I do!

Here are some of the topics that I considered, and the ideas and solutions I came up with:

Electrical and water pipes:

They are usually inside the walls. When the walls are sticks with drywall on top it already is a lot of trouble to fix any problems with these pipes or to extend them in some way. Here in Panama, the walls are concrete. If you need to open one to get at pipes, you need a jackhammer! And whatever was not yet broken about the pipe is surely going to be completely destroyed once the wall is open!

I chose to put my pipes outside the wall, and cover them up with wooden cladding, which is fastened by screws, not nails. If you need to get at them, simply unscrew three, four screws and there you go!

electrical pipes covered behind wood


Waterpipes visible, thus in copper instead of pvc

Drain clean-outs:

There’s no maintenance issue more troublesome to me than clogged drain pipes. Except, clogged drainpipes that are not accessible! 
For that reason, i put clean-out plugs everywhere! Every toilet and shower drain has such a access point right outside, on the other side of the bathroom wall. On every corner and every endpoint of the main drain pipe there’s an access point as well.
zoom in to see the access points for the snake


I put a lot of effort into ensuring the drains are all following the 2-3% declination rule, so I’m thinking (hoping) I won’t have many issues of clogged pipes. But if there’s one, at least it’s easy to get the snake to where the clog is!

Wall coloring:

painting your house is a very costly and/or work intense job. Having concrete walls, it’s possible to avoid having to paint your house for as long as you live! The trick is, using “tinta” with white concrete. That way, the wall “is” colored by itself, and does not need coats of paint. No paint, no need to renew paint!
I used yellow tinta - it goes well with the green of the land and the red of the roof and tile floor


Sun, rain, and high humidity:

There are three big issues in the tropics with which your building has to cope: Sun, rain, and humidity.

The sun heats up roof and walls, making the inside be like a baking oven - if your architecture doesn’t have a way to get rid of the heat easily and without lots of equipment and energy effort.
I raised the roof a bit above the concrete, and leave the space between them free, so hot air can easily escape to be replaced by fresh, cooler air. 
Secondly, I put a wooden ceiling on top of the rooms. That insulates the concrete walls and the air inside the room from the heat radiation of the hot roof.
sufficient space between roof and concrete


No need for expensive - to buy, to install, and to operate - air conditioning systems!

The frequent, sometimes very heavy rain, turns any terrain into either a river (if it’s sloped) or a lake (if it’s level), or both!
I put the slab on top of a thick layer of gravel, which lets water run through easily. In addition, I put drainage pipes around the perimeter of the house, so that most of water is running of right away and not even getting to the gravel cushion.
notice the canal for the drainage pipes 

Slab is floating on thick cushion of gravel


No need for sump-pumps or similar equipment to deal with the abundance of water!

The humidity facilitates the growth of mold and mildew. In my experience, once the air is not moving, mold is developing very quickly. And once you have it, it’s virtually impossible to get rid of! 
I put large windows, and designed them to be able to be opened completely. That way, it is easy to keep the air moving in the rooms - simply leave the windows open…
Side windows can by tilted up - 100% open, sash needs no space as it hangs close to the ceiling

front window is 1,8 by 3m (6 by 10 ft)


No need for expensive dehydration equipment!

No systems installed, means the least amount of maintenance effort required!

Summarizing 


I tried to build a sustainable, easy to maintain, comfortable, and healthy home. I’m sure there are many more topics and ideas that could be considered and dealt with. But so far, it feels really good living in the space!
tranquil, sustainable, comfortable, affordable tropical living


Monday, January 8, 2024

Gotchas of Panamanian buildings - worst practices

In every industry, over time, best practices are developed and defined. The builders in Panama, however, seems to not have adopted much of what’s common practice in other countries. Well, there are two types of builders: the large construction firms that build skyscrapers, and the little guys who build homes by hand.

I have no idea about the large construction firms, I’m taking about the little guys. 

Many of the little farmers can not survive off their farm and are subsidizing their income by working in construction. Everybody out in the country seems to know how to work with concrete. Many know how to weld, or do plumbing, or electrical installations.
They have learned by watching and assisting somebody else, and then just doing it often. They never got proper training, or schooling about the theory.  They do as well as they know how!

At the same time, most people here don’t have a large enough income to be able to afford hiring a firm to build their homes. Instead, they save up a little money and buy some sand and rocks and a couple of blocks and bags of cement, and build as far as their material reaches. Then they wait until they have more money, to do the next.

As a consequence, work is performed in a way that is the least costly, and the easiest to perform.

My personal most feared “worst practices” are these:

Anywhere you go in the country you’ll find a trashcan next to the toilet bowl into which you’re supposed to place the used toiletpaper. you should not throw the paper into the toilet, as you’re used to do in europe, the US or similar countries. the reason for this is, that the drain pipes are sometimes too small and most of the times don’t have the correct declination. if that pipe is too steep (more than 3cm per m, 1” per 3 ft) or too shallow (less than 2cm per m, 3/4” per 3ft), the solids tend to get stuck. With paper it clogs the pipe frequently. Worst practice: drain pipes incorrect declination.
Declination of drain pipes does often not follow best practices, but rather the terrain


In my house I put extra care and effort to ensure the pipes have the right declination. So toiletpaper can be flushed down without problems! 
Also, I ensured that for every pipe there’s easy access for a snake tool,in case the pipe does get clogged for any reason at any time.

Electrical wires are color coded. White is neutral, bare or green is ground, and black (red, blue, or yellow) are phases. In local homes (and businesses as well) you often find cables used not according to their color. That makes troubleshooting very difficult and dangerous!

In this box, the leaving cable uses white for hot and red for neutral!

In my house I took great care that wires are used with the correct color coding. 
Also, I made sure in every junction-box and the breaker-box every wire is labeled with the circuit it belongs to. Again, to make maintenance and troubleshooting easier, should there ever be a problem, or the need to extend the system.


The floor in walk-in showers are supposed to decline towards the drain. Often it doesn’t, so there’s always a puddle on the floor. Over time that part of the floor gets grimy and slippery. 

In my house I had the mason adjust the subflooring multiple times, until there was the right declination in the whole bathroom! Also, I selected tiles that don’t get slippery when wet. That way slip-and-fall accidents are less likely.

There are more issues I noticed. I might add some more at another time… For now, these are the most annoying, and the easiest avoidable issues…

Sunday, January 7, 2024

Gotchas of Panamanian buildings - architecture and the basics

 New acquaintances happen to start building their home here in Panama, actually, not too far from my house. I started telling them about various aspects about the local architecture and building practices. then I realized, it might be interesting and helpful to others as well. so I decided to blog about the gotchas I encountered…

Here you go! The first installment. More to come…

The local architecture has two styles: the local style and the foreigners style. Both are, in my view, flawed, as they don’t take the climate and environmental problems into account.

First, the style for foreigners:

On first sight, the homes built for foreigners are lovely! But, after careful examination, the beauty turns out to be just skin-deep! 

typical house for foreigners - US architecture, solving problems they have there, but ignoring problems and benefits we have here

Essentially, the architecture is just copied from the US. There are specific problems that are addressed by the designs. However, these problems don’t exist here! In the US you need your home to protect you from very low temperatures in the winter and very high temperatures in the summer. Also, tornadoes are possible in almost the whole country. 

Here in Panama, the temperatures are always the same, and it rarely reaches the 90’s C (upper 30’s F). So you don’t need protection from the temperatures! Also, except in some special places, wind is not a problem. There are no tornados, here, nor hurricanes!

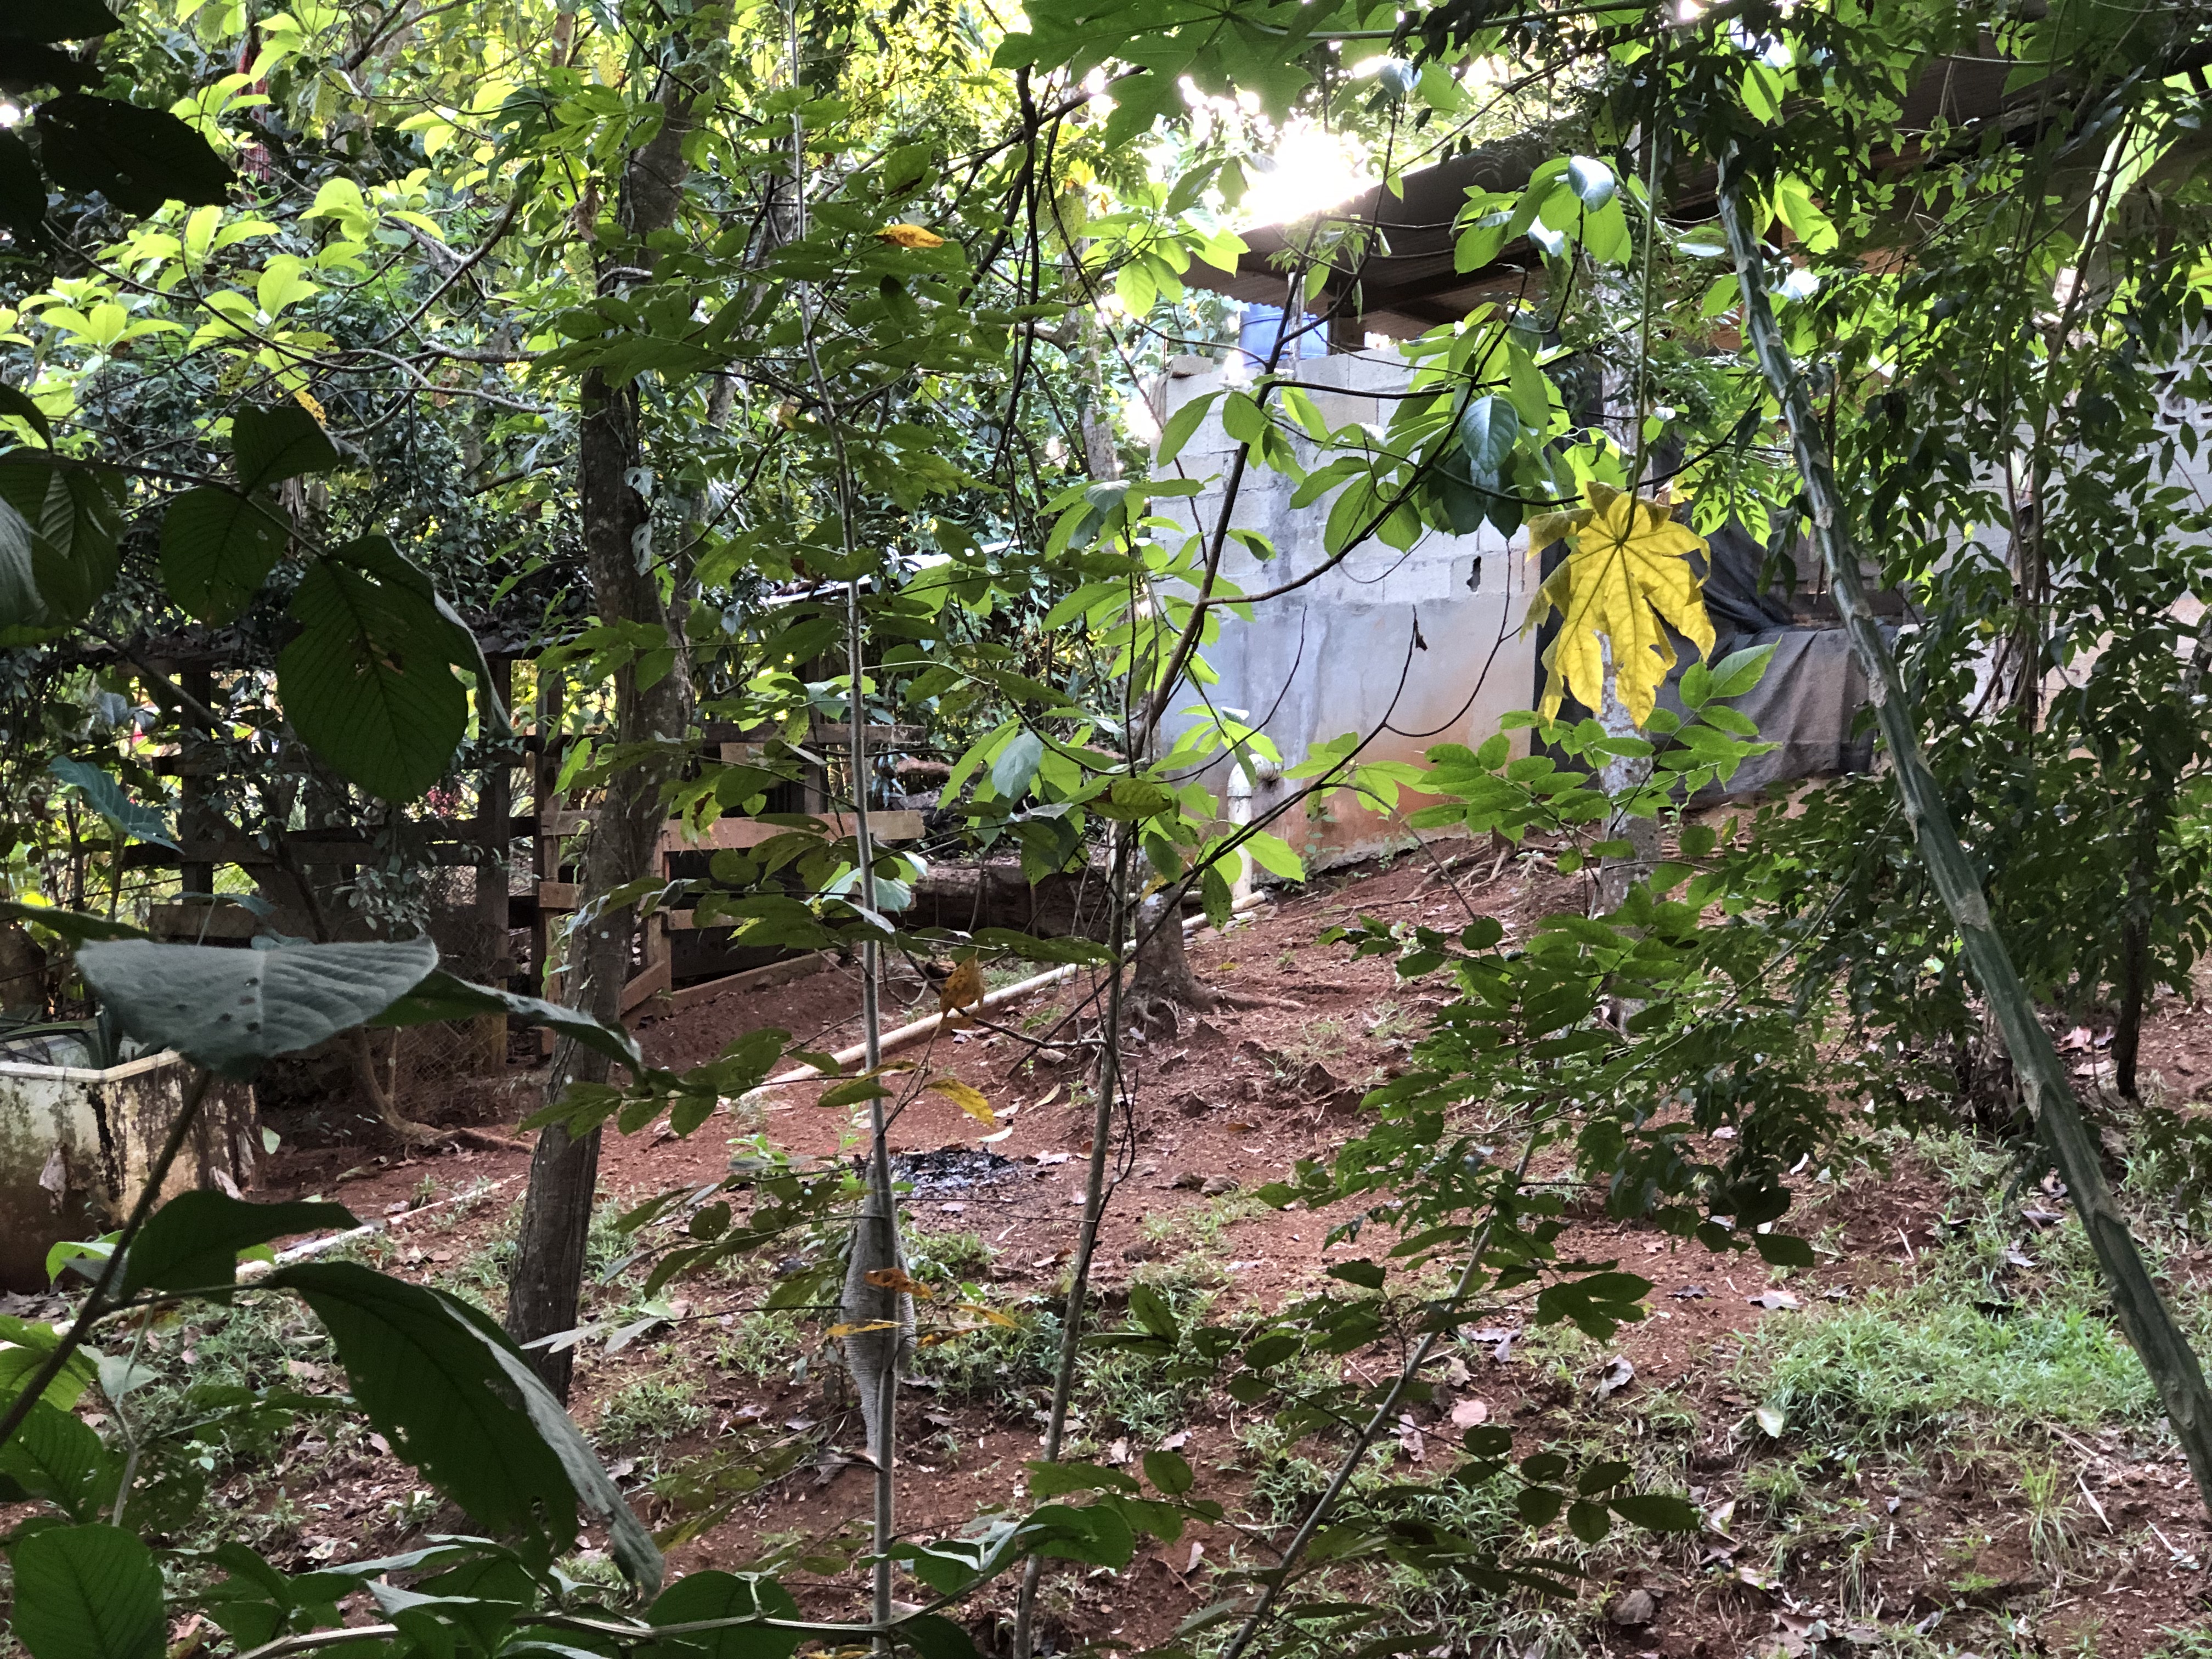
Here, you can be outside all the time, except for sleeping. So, with a house where all livingspace is indoors, isolated from the rest of the world, you’re missing out on the best part of living in Panama - living outside!

What’s worse, though, is, that this architecture does not offer a solution for the environmental problems typical for here: lots of sun and rain, and always super high humidity of the air, unreliable electricity and water supply. To fix the lack of consideration of these topics in the design, super large air-conditioning and dehumidifying systems are installed. In addition of being locked away from the fresh air, you’re subjected to constant noise, and high electricity bills! 

I’m trying a different architecture, that takes the local problems into consideration, and maximizes the benefits of living in a tropical location. (More on that later…)

But before that, the local style:

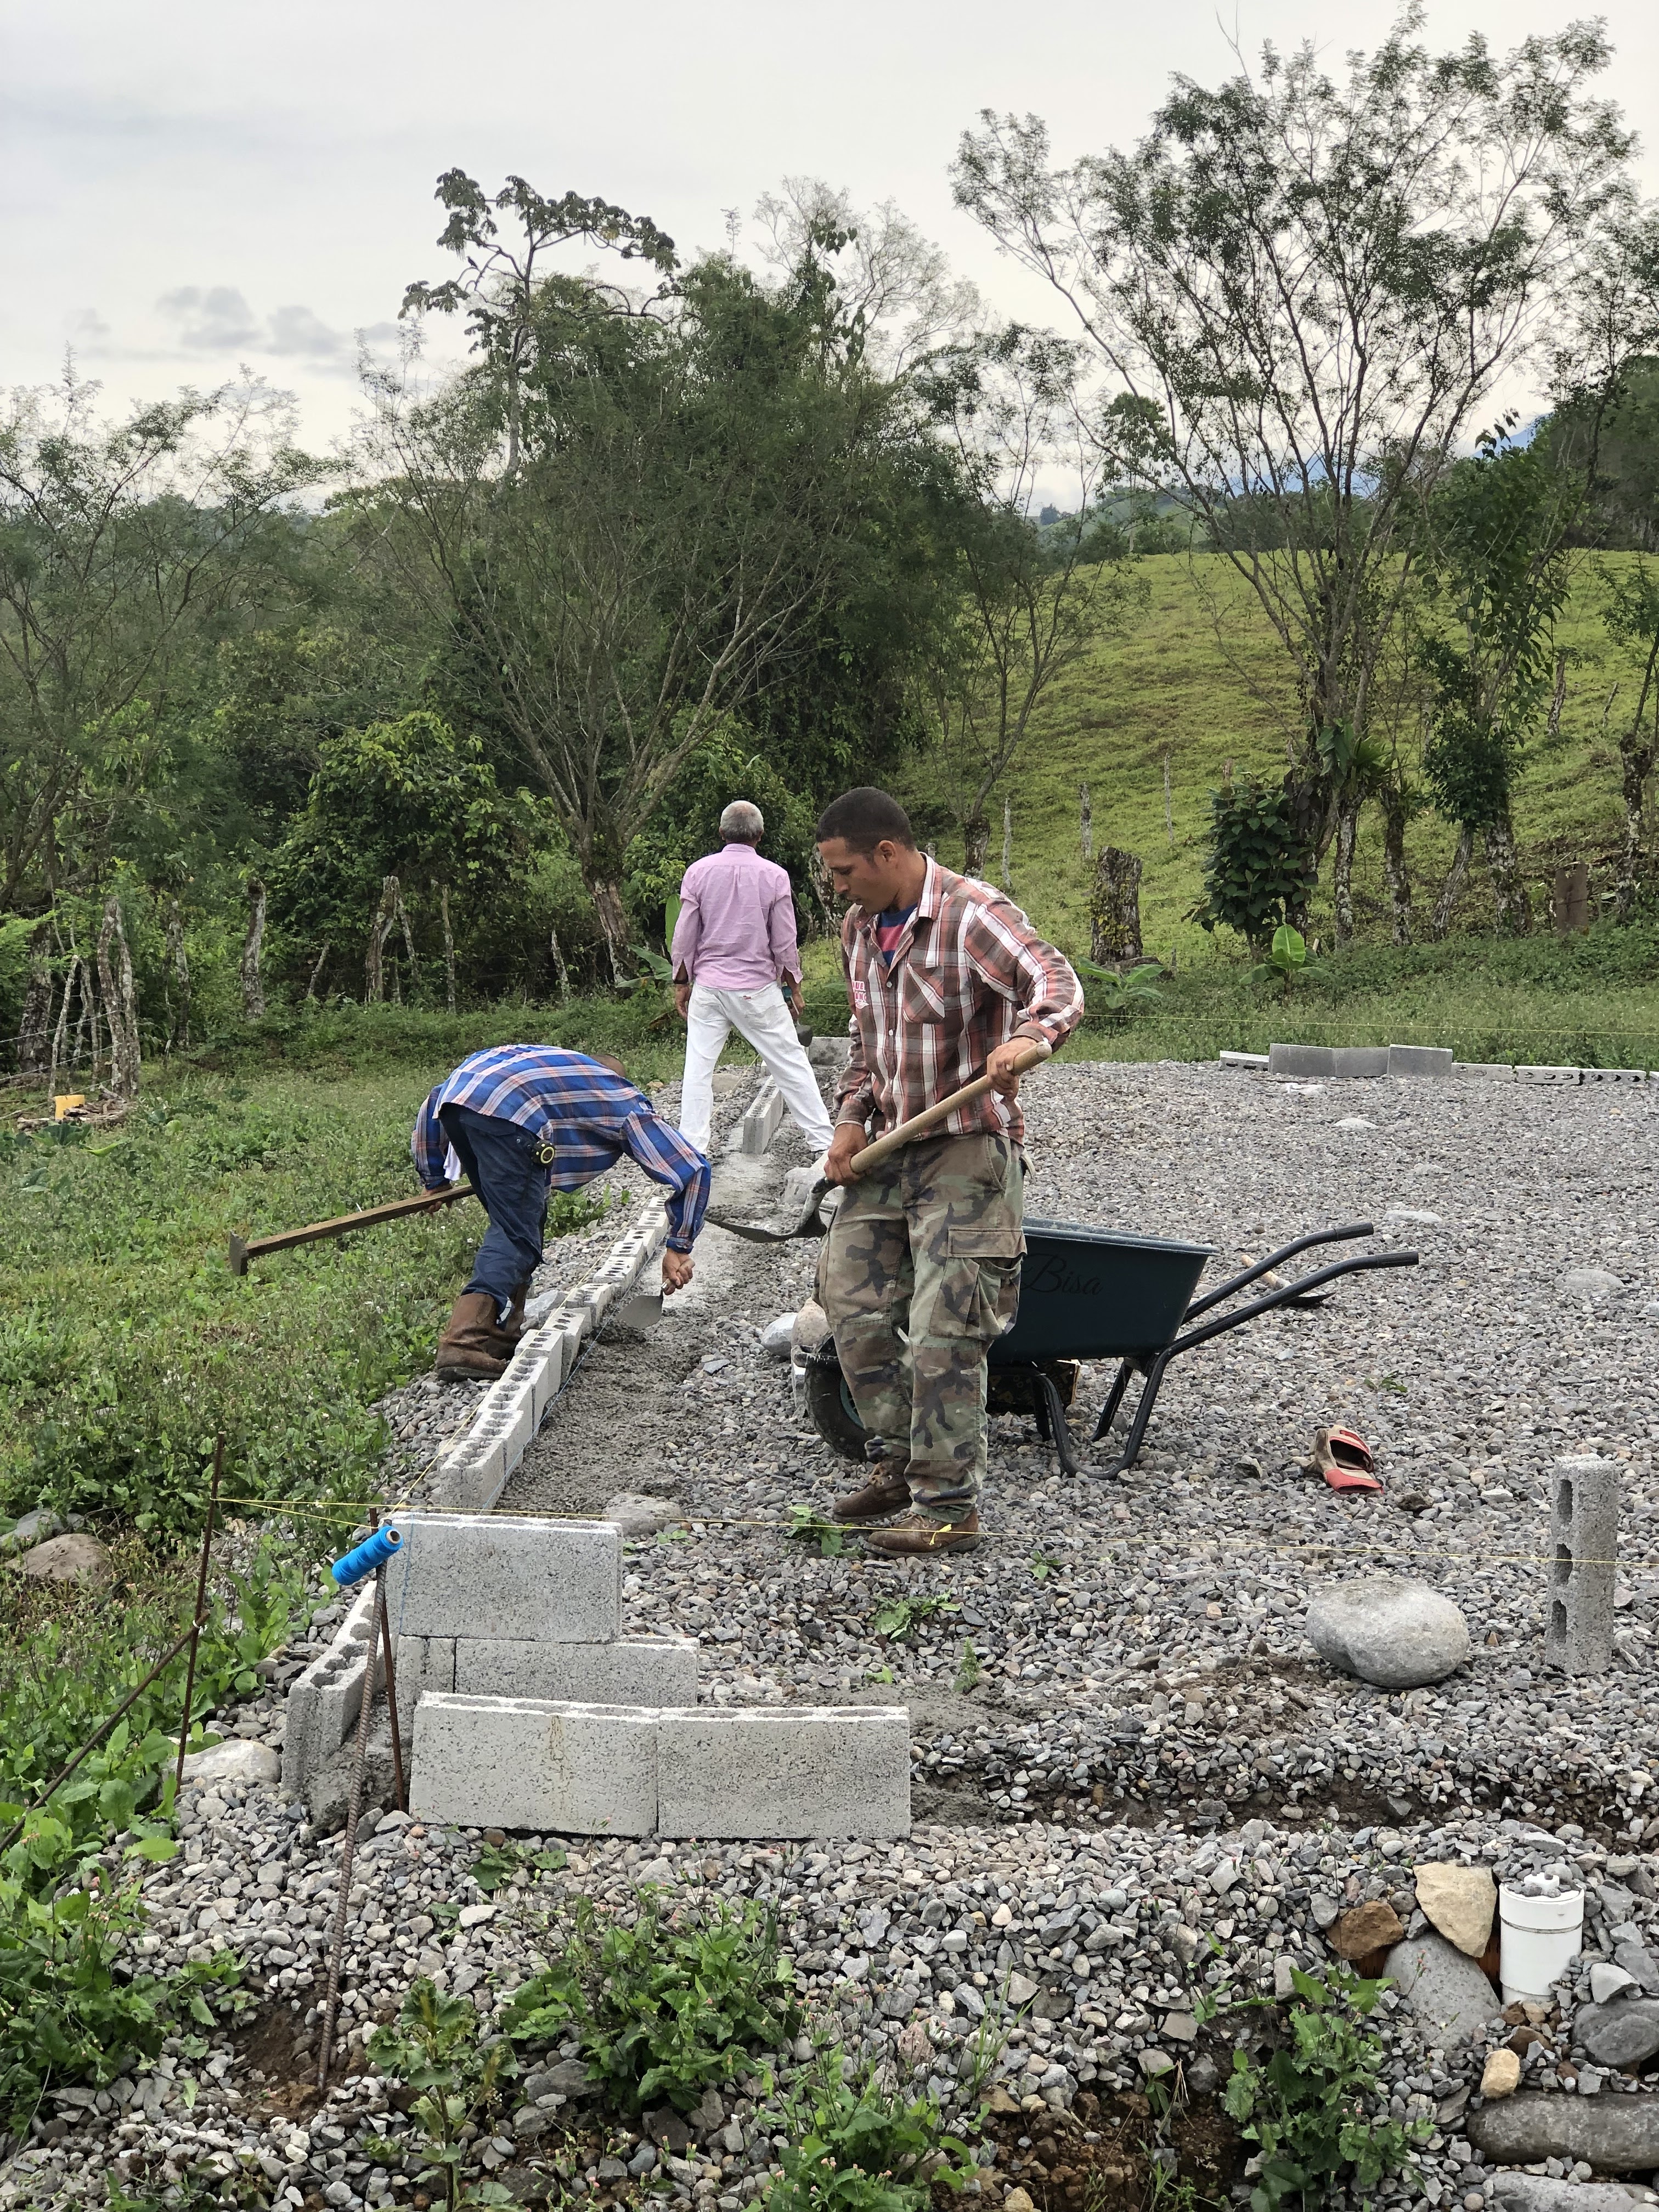
They dig some ditches where the walls are going to be to create a foundation for them. The sewer pipes are laid. And the walls put on top of the foundation. On top of the walls cariolas are being placed and welded onto the rebars sticking out of the concrete. The sheet metal roof is screwed onto these cariolas.

First problem: the foundation. Much of the land is covered with fertile, black soil. that soil doesn’t carry load well, easily shifts due to much water during the rainy season and lack of water during the dry season, and from the relatively frequent, although weak, earthquakes.

As a result, many buildings have cracks in the walls, or are starting to hang a little over time.

My attempt to address the problem is to use a bed of cracked stones, similar to the beds of railroad tracks. On top of that, I poured a 20 cm thick concrete slab, onto which I built the walls and placed the posts that carry the roof.  First of all, water easily finds its way through this bed of rocks, secondly I placed drainage pipes all around to ensure there’s never much water getting there in the first place. But, should anything underneath there shift a little, the rocks distribute the load and cover for the uneven load-bearing quality of the ground underneath.

Using 10 cm wide blocks to build a form for the concrete slab on top of 20 cm crushed stones

laying the rebar mesh and placing the cariola frames for the doors so everything is nicely connected with the slab

pouring the concrete slab - Iris working like the men!

Walls on top of the slab. Two rooms with a bathroom each and the connecting wall that separates the kitchen from the back terrace. On the left, forms for poured concrete corner columns are visible

Welding together the cariola structure that will hold the sheetmetal to form the roof

The basic structure is done! The roof is also almost finished, it protects the rooms and the big terrace that is the living room, dining room and kitchen. Living in and with nature, not isolated and separated from it!


Next problem: the walls. The walls are build with 10cm thick concrete blocks, which have three holes to be filled with concrete once the block is in position. Aside of some of the workers not using “plomos” to make sure the wall is really vertical, most use their “palaustre” (heart shaped trowel) to push the concrete down in the holes and compact it. These tools, however, are too wide to go all the way to the bottom of the block. As a result, usually the blocks have concrete on top, but a hollow space filled with air in the bottom. 

typical block wall, space for columns on side of doors nicely visible. Hole in block to be filled with concrete visible well, too.


The building code requires all corners and the sides of all windows and doors to be solid concrete columns, build through forms, not blocks, and with rebars enforced. And on top of the windows and doors, and the top 30 cm of all walls are supposed to be solid concrete beams, too - also built with forms and rebar enforced. Those parts should take the load, so even though the walls are mostly air, the house should not crumble. But, “should” isn’t good enough for me! I want to be sure. So i asked - and fought during the whole wall building process - that the helpers use rebar sticks to ensure the holes in the blocks are filled with compacted concrete all the way to the bottom.

Third problem: the heat and humidity. The roof gets very hot from the sun.VERY hot! T
here is no space between roof and wall, so all that heat is absorbed by the concrete. Even as the temperatures fall during the night, it is always hot in these houses! The sun heats up the house during the day, the concrete keeps it hot during the night! The lack of decently sized windows and the fact that the local style sliding windows only open half, doesn’t really help the situation.

Also, due to the super high humidity all the time, when there’s standing air, there’s very quickly mold and mildew. All the mold-resistant paint in the world is not a working solution. Keeping fans running in every room for 24 hours a day helps, but uses a lot of energy!

My attempt to tackle the problem with the humidity is by having many big windows, which can be opened all the way. That way, there’s always a breeze in the room - even without fan. No mold, nor mildew! And feels cooler, too!

To reduce the heat in the house, I have a pretty large crawlspace between the sheet metal roof and the wooden ceiling of the rooms. There’s no wall above the rooms, so air can circulate and move freely. Middle school physics says, hot air rises.. Alright, the air that gets heated up under the sheetmetal can freely leave that space, and cooler air can move in. that crawlspace never gets really hot! And, wood being a good insulator, the wooden ceiling - even though only 2cm (3/4”) thick, ensures that the room, nor the walls that makeup the room, never get really hot.


note the space between the ceiling of the rooms and the roof, and the big windows 

I got the confirmation that this works already while building: several of the workers mentioned on various occasions that it so nice to work in the house because it is  not so hot, as in their homes…


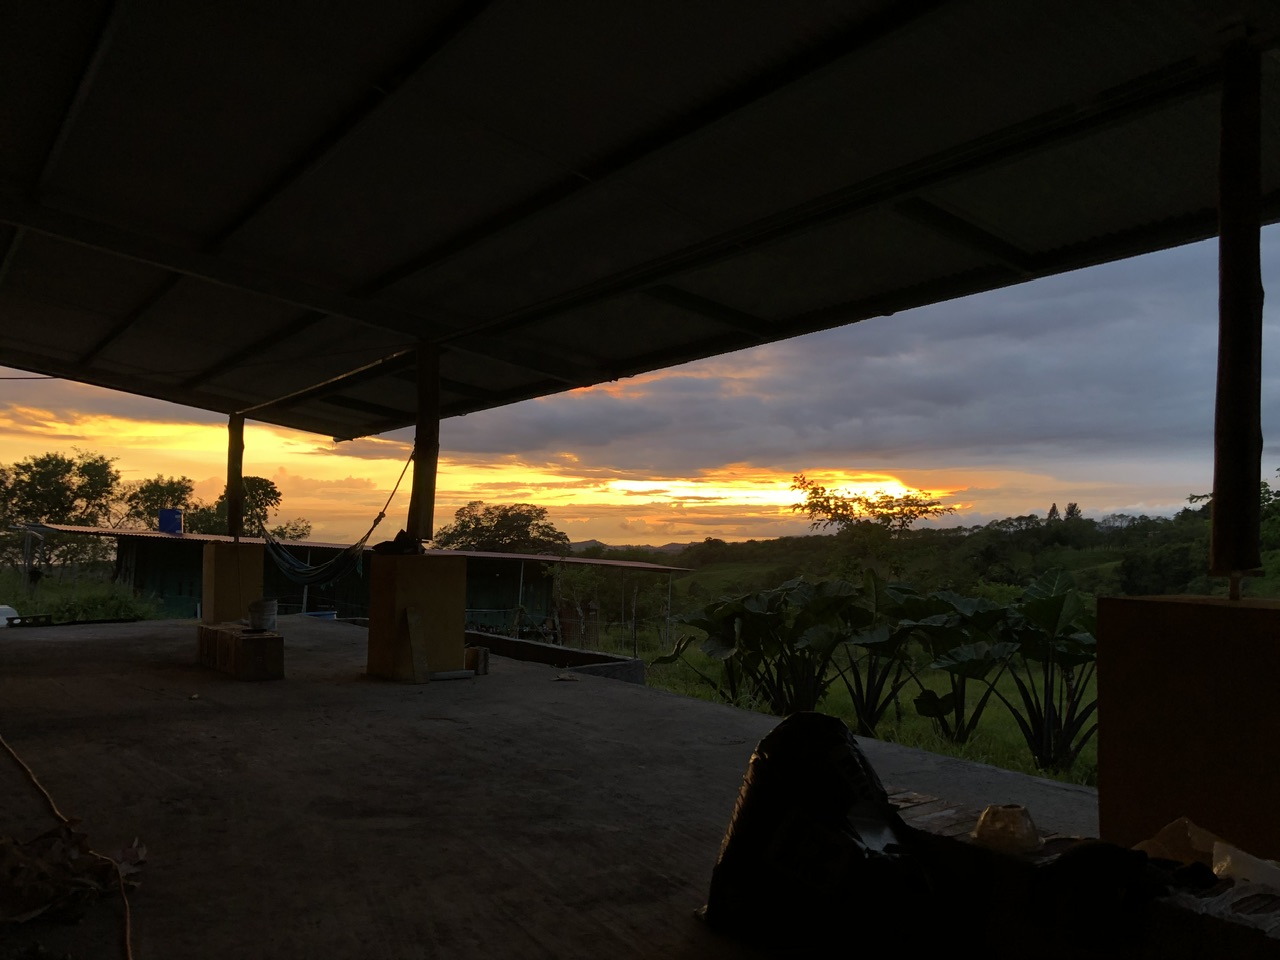
The best part about living in this tropical place is, that you can be outside all day. There’s nothing nicer than hearing the birds, the wind in the trees, the rain gushing down, to feel the breeze, to always breath fresh air!

The architecture I think is ideal for here is a home that most of all has a big terrace under a roof. The roof keeps you dry when it’s raining, and its shade protects you from the sun. There are bedrooms and bathrooms that are wrapped in walls, but they, too, are well connected with the outside through doors and  large windows that are protected by insect-netting and can be left open almost all the time.


large terrace serves as living room, dining room, and kitchen

rain water is collected and provides the water for showers, toilets, and kitchen as well (filtered for drinking purposes). Stored in a higher altitude tank water supply works even during power-outages

Large windows in the bedrooms ensure the air in the room is always moving, reducing if not eliminating problems with mold and mildew


This house needs no air-conditioning, no dehumidifier, is independent of the public watersupply, and reduces the negative impact of the frequent power outages. By adding PV panels and a larger battery, the house can be completely independent from the public power-supply as well. 

You basically live in your garden - paradisical!


Update: just saw an advertisement for a house, which is built in typical architecture:

Typical house for local middle-class. Interestingly, the add is in english, implying they are trying to address foreigners, too…


Look at how small the windows are, and remember, this type doesn’t open all the way; only one half slides in front of the other one. There’s no air circulation at all in this house! Can you imagine how hot that house gets when there’s a power outage! It’s a baking-oven!

Sunday, October 1, 2023

Reminiscing


I was always blessed with new ideas. Usually years before the “world was ready” for them. This is a blessing and a curse. The blessing, obviously, is that such ideas are exciting and fun to ponder. But, pondering alone never seemed sufficient for me, I always wanted to implement them, too!

I (choose to) believe, that “sending ideas” is one of the three ways the greater universe (or whatever you want to call whatever is outside of the physical system we live in - our universe) is influencing this system (our universe). I find it hard to believe that ideas just come from the neurons flying around my little, limited capacity brain… (Coincidences, and the fact that every person seems to have a passion, a topic that is very dear to their heart, are the other two outside influence I was able to observe (more on spiritual ideas, fulfilling live's purpose, and finding happiness here: toolOfTheUniverse.org).

The world seems to be functioning quite well as it is. But, then, there’s an idea that somebody receives. A foreign item. Something that wasn’t there as of yet. The system was operating without it. But now, as this person gets this idea, it is possible that it becomes part of this system. And the course of our world is forever changed. No matter in what little way… 


On the terrace of the home I’m building in Chiriquí the mason trying to lay tiles had the first tile slanted just a little - maybe 1 mm. Trying to keep all the other tiles level with this one, by the time his line reached the other end of the area 4m down the line, he ended up needing 4 cm of padding! Any little thing now can - and most often does - have a big impact later on! 


Ok, back to my ideas…

The wonderful thing about receiving ideas is that it’s exciting. The downside of it is, that if an idea is a bit farther out than the general population can appreciate, it’s hard to find somebody else who would partner in implementing this 


For example:

In the later part of the 80s I had the realization, that most of a relational database application - which most business application are still today - is made up of the same kind of program. The only difference in the various programs of any single type are the name of the table and the names and numbers of fields. There is also most often more or less of business logic for each of the tables, which differs a lot from one table to the other - but that is a comparably small portion.

So 35 years ago I implemented a first program generator. A program that writes the 4, 5 different types of programs needed for every table. It also linked the programs according to the relationships of the tables, created menus, and provided the hooks for business-logic, printing, and so forth.

That generator was the reason why Progress Software hired me in 93 - finally realizing my dream to move to the USA! Unfortunately, the new CTO, who started between my being hired and my actually starting with them, didn’t appreciate the idea - as was so often the case in my life… The project was cancelled, and I ended up working on something else…

BTW, Object Oriented Programming seems to be another approach to deal with the same problem: repetitive code. My experience is, though, that changing from procedural to object oriented approach did not make writing and maintaining programs easier at all. I’ve come to the conclusion, if you really want to create a mess, use object oriented programing! Without being very consistent in your naming of things and structuring your classes, a system becomes exponentially harder to maintain the bigger it gets. Larger system are virtually unmaintainable! At least those I encountered were so…

In the early 2010s I used the same approach as earlier on in my life to create a browser based application. I consider this application “my Mona Lisa”. After years of changing - not just the programs and DB structure, but even the whole focus of the application! - the system is still neat and consistent and super easy to maintain and expand! This application proves it is possible, it proves it is much less costly to build, and it proves to solve the typical problems systems are plagued with: hard to maintain, hard to extend, hard to adjust, hard for somebody new to understand and get into, high bug rate in code from get go and even higher once modified.

How is that possible? Estimated 80% of the code is generated and can easily be regenerated when there are DB structure changes. These programs are basically self-maintaining. The customized, manually written code is super-consistently following the same naming conventions and style as the generated code. That makes it very easy to understand, which in turn makes it easy to modify and extend.

I implemented this approach for procedural OpenEdge code. But, it can be used for any other language and many other styles of programming as well.

Personally, I don’t think we are able to deal with the complexities of the ever growing systems without the help of computers… computer programmed code is super consistent. Consistency makes life easier for not just people, but for computers as well…


Today, as I am retired from programming, I am working in a totally different area. But, I am, again, trying to implement ideas, new approaches.


I observed the architecture of homes in Panama. And it quickly became clear, there’s plenty of room for improvements!

The focus of local, Panamanian architecture is “cheap”. While it is fulfilling certain criteria well, there are tons of compromises about functionality and comfort. Too many for my liking!

For the foreigners, the architecture of northern areas is simply copied. There are problems in the north that simply don’t exist here - extreme temperatures is just the biggest of them. And there are problem here, that simply don’t exist in the north - super high humidity, just to name one of the biggies. Northern architecture provides solutions for northern problems. But not just NOT provide solutions for tropical problems, but even causes problems in tropical areas.

Using all the ideas and approaches I have encountered over the course of my life, adding my observations and experience living in a tropical climate, and - yet again, as usual - receiving many ideas, I am trying to create a home in Chiriquí that is comfortable and functional, affordable, makes use of and benefits from the local resources and climate, and deals with the local problems.

As if that is not exciting enough, it all is happening in a new, different language, and in an unfamiliar, different culture!

Despite being very busy and occupied by that big task, I’m trying to find the time to blog a little about it.
idea. 


My first house is taking shape already. So far, many of the ideas and approaches used are validated already! The topics of heat, humidity, type of foundation are just the biggest items on the list that are taken care of. Not by trying to fix the symptoms of the problems with the architecture by simply adding a/c, dehumidifier, and patching cracks in walls and floors. But, by having the appropriate basic architecture to deal with these problems from the get-go!

Even though it is not yet finished, I am about to put it on the market. I’m curious how it will be received by those who are coming to retire in Panama… For now, I enjoy my sunrises and sunsets on the big terrace overlooking the pastures with cows and the one or the other horse, and listening to the birds, the rushing of the water of the river bordering my land, and the sound of the rain on the roof when the afternoon showers arrive…

Two of the (to me) most amazing things of the nights here: the hundreds of lightning bugs in the surrounding fields create the flair of magic. And for the first time in over 40 years I am able to see the milky way again, due to the much lower light pollution around here, than  where I used to live in the US and Europe.


Tuesday, September 19, 2023

Temperature comfort…

We just came back from La Concepción. There, the temperature was 28C (82F). 

By the time we got up to the first village, El Santo, the temperature dropped to 24C (76F). 

Further along in Santa Rosa it was 22C (72F). 

And up here at home in Camarón Arriba it is comfortsble 21C (70F).

A perfect evening to enjoy the hammock…


Even during the day and with the sun out it doesn’t heat up above 30C. On the terrace in the shade under the roof there’s always a little breeze, which makes it really very comfortable - no need for an a/c!

Can’t wait for the construction to be finished so we can enjoy the place, before it sells…

Yes, after all that effort and elbow grease and loving attention I’m still going to sell this home to kind and loving people!

Kind and loving, because who wants neighbors who are not kind and loving?🤪

Well, all in all, this truly is paradise for us…

Monday, April 17, 2023

The roof - day 3

Yesterday, the installation of the sheet metal on the east side had started. Today, they finished that whole east side. And started the installation on the west side, too.

https://drive.google.com/uc?export=view&id=1CMe2Sb5C8Kbt5WbfvHuK0tJyaC854-nE


Here, we encountered another obstacle!

I had purchased most of the sheetmetal last year already - in anticipation of prices rising and thinking the construction would start by August or so... Well, construction didn't start until March! But, here we are, and I'm glad I had bought the cariolas and sheet metal last year - this year they are almost 20% more expensive!!!

Well, I had bought "almost" all sheet-metal... Why just "almost"? Maybe in another post... 

The sheets I bought are 5.5 m long. But the west-side of the roof is 7.5 m. So I needed sheets to cover the remaining 2 m. I ordered them at the ferreteria, and had them delivered. But, as we were trying to install these small pieces, it turns out, the canals of the 5.5m sheets are of a different width then the canales of the 2.1m sheets!!! 

https://drive.google.com/uc?export=view&id=1uadRwzgs_r9ln52Hh-ta6onrjPx7omGihttps://drive.google.com/uc?export=view&id=1M9fxEjjTpznpNj0-dQ9Hf0fly4u-BqH4

Impossible to use these small sheets! WHat to do?!?

I decided to cut 6 of the remaining 20 5.5 m long sheets; each creating 2 2.1m sheets and a 1.2 m sheet. Thus, with two large sheet cut, I was able to cover the missing part of 5 large sheets. All in all 14 runs of the 18 that make up the whole roof.

After work I went to Bugaba to the Ferreteria and I ordered 4 more sheets of 5.5m, and two sheets of 4.20 (to create all together 4 2.1 m long sheets, to cover the missing part of the 4 new runs. I got them delivered the next day (day 4). Yeay! Problem solved! Situation stable!

So I thought...

Sunday, April 16, 2023

The roof - day one

Today's the day! Today we're starting the roof! Yeay!

First task is to lift the center beam up onto the four main posts ontop of the columns of the wall. This is a monster! 6 pieces of 6" cariolas welded together to make a single 18 m long cavallo!

But, four guys simply grabbed that thing and lifted it up as if it was made of cardboard! Fascinating how much strength these people here have!!!


After that was in place, and the little pieces of cariola that were slid into the grooves on top of the posts were welded onto the center-beam it was stable enough to start attaching the roof trusses. 


One by one, all four of the ones that support the east side of the roof were put in place.


I had worried about that a lot - playing the process in my head over and over again. It turned out to be really not much of a big deal after all! Phew! I'm really glad about that!!!

Once the roof-trusses were in place the 6-fold H of 4" cariolas was lifted and put in place, and welded onto the trusses. Now, nothing moves anymore!


Then, from the top down, the remaining 4 pieces of 18 m long 4" cariolas were placed and welded. This all was quite easy! 


The first group even started putting the first couple of sheets of zinc (sheet metal) in place, and screwing it onto the finished east side-structure.
By the end of the day, the east side looked already very nice! Structure finished, and 4 runs of the sheet metal in place! Yeay!

Tomorrow will be a difficult day, though, We need to install the trusses for the west side of the roof. They rest on the long columns which need to be mounted onto the little pedestals on the terrace. Not sure how we can get these columns mounted and stable enough that the trusses can be put in place.

Once the trusses are in place, these columns can't move much anymore and we're golden... But how to get there? That's the big question!

The roof - Earthquake - Lessons Learned

Roofs in Panama are relatively uncomplicated. There's a roster of cariolas and a layer of sheetmetal on top of it, affixed with screws. All of it rests on some columns.

My roof is just like that.

Sounds simple, right? Yeap. And in theory, there's no difference between theory and practice. But, as you know, in practice there is! (Yogi Bera )


So, the theory is, I have 4 columns on the terrace, 2 rows of each 4 columns ontop of the walls of the rooms, and the corners of the bathroom which carry the trusses. Since I have a teak plantation and love wood, I decided to use tree trunks as columns. When the trusses are installed and the cross bars welded on, the whole structure is very stable.


Here' comes the practical part:


To assemble the whole thing, these columns need something to keep the vertical! They rest on a metal boot which is concreted in into pedestal on the terrace or wall. But it's the same problem as trying to standup a pencil... 

Yesterday there was an earthquake just about 70 km away; 6.6 on Richter scale. It was quite noticeable! My glassjar actually fell off the shelf and broke, that's how strong I felt it here! 


It's a bit scary, but if you're standing on the ground and don't have a large building or structure atop of you, it's not really a problem.

What it did do, though, was, to remind me, I need to keep earthquakes in mind with my house! I have everything build on a solid concrete slab, which rests on a thick layer of crushed rocks. So if something moves about the house, the whole house is moving. I am hoping it won't develop cracks from tensions created by traditional foundations shifting in relation to each other. So that is "bien"!

But, looking at the structure from the distance, it dawned on me, that the columns that hold up the roof need to be supported in a way, that even if the house starts moving sideways, they won't loose their balance.


Being spiritual as I am, I see this earthquake as sent by the Universe to help me make the next step!


As I am thinking about how to reinforce the columns, I realize, that this is actually the solution for the problem of how to install the roof trusses one by one and keep the columns vertical while doing so!


So, today, I added, where visible, cross boards criss crossing the space between two columns on top of the walls; and where not visible later, 1/2" rebar criss crossing the columns of one row with the respective other of the next row. With that, I have 2 groups of four columns which are interlocked and stabilized amongst each other. 


That allows me to lift the heavy center beam in place, and weld it onto the little pieces of cariolas I used on top of the columns. And later, I can lift the trusses in place, too, and have the columns not just sustain vertical force of the weight, but also horizontal force of the trusses shifting and moving during installation.


Another item of practice vs theory:

The central beam consists of 6 pieces de 15cm by 610cm cariolas, calibre 16 (the strong one). Each of them weights (estimated) 40 to 45 kg (80 to 90 lb). The whole thing is 18 m long and weighs somewhere between 240 to 270 kg!

[one of the trusses - a “cavallo” built of two sandwiched cariolas]

It needs several strong men to lift that thing! And, until it is welded in place, and supported by welded-on trusses left and right, these men need to hold it in place. 

My original design did not have this center beam, but only 4 individual trusses, running in parallel. The architect added this piece. Also, my design had the roof be symmetrical, so both sides the same area, and the same inclination. 


That centerbeam, of course, needs to be supported, so the architect put it ontop of one row of columns - he chose the columns on top of the corners of the wall. Now the roof above the terrace is about 5 meters wide, and the side above the rooms is 7 meters.

Really, that center-beam carries no weight whatsoever. It did not need to be so strong! Instead of using ultra strong and heavy 15cm wide cariolas, 7.5cm wide ones would have sufficed! And I think we wouldn't even have needed to make a "cavallo" - that is double the U-shaped cariolas to make a tube shaped beam.

But, we have the thing already, so we might as well use it...

However, how to put it in place?!? If we put it ontop of the columns on the corners, all the strong men are standing on one side of that heavy thing. If it ever shifts too far to the other side, we won't be able to hold it, and it will fall to the ground - who knows what kind of damage this might cause. And the one or other men might fall with that thing off the ceiling of the room as well!

So, today, I came up with the idea of flipping the roofside around - i.e. have the terrace roof be the 7m wide one, and the roof above the rooms the 5 meter wide one. That allows us to put that centerbeam ontop of the column that in the center of the wall of the room, rather the corner. With that, men can stand on either side of it when it is being put in place!


Today, I was able to install one and a half of those 2 4-columns groups. Yeay!


I did not have enough teak logs for all the columns. So I thought of using some other logs. Unfortunately, ants got into one of them. It would be very difficult to replace such a column once the roof is in place. So I don't want to risk just to kill the ants and install anyhow. Instead, I contacted the sawmill and asked for another log. It's cedar or oak or teca - I will see once he delivers it, hopefully tomorrow...

Once I have this log, I can finish the second group of 4-columns. And once that is done, we can install that darn center-beam. And after that, we can install the roof trusses of at least on side of the roof. For the other side, I need to install and reinforce the long posts on top of the pedestals on the terrace. That's another hot topic, for which I am not yet sure I have a solution that will work in practice... 

Well, tomorrow is another day... We'll see what I'll learn today, and what ideas I'll be given by the Universe tonight...

The roof - day 6 - Sunday

On Sunday, Sergio came over for another 1/2 hour to add a few more missing screws to ensure all sheets are securely fasten onto the cariola structure. Originally, we had planned on installing the caballette - the sheet-metal that is put on top of the roof, right above the main cavallo, just where the sheet metals of the east and west side meet.


However, After he ensured me that not installing it will not cause much water leakage, I decided to postpone this task until we come back from Santa Catalina in 2 to 3 weeks...

More than 88 screw heads need to be covered by sealer paint - it gets mighty hot in the sun ontop of that roof!

I spent the Sunday morning on top of the roof, covering all 800 screws with Sulfatil ( a thick paint-like liquid that serves as sealer) to ensure none of the screw holes. It took almost a hole quart. Well, I'm telling you: It gets mighty hot on the roof in the sun - even though we're 700 m (2200 ft) above sealevel!
 
Oh, why did I postpone the installation of the caballette?

Well, I noticed that even thought the sun is heating uo the roof quite a bit, and in the sun it is quite hot, under the roof it is very comfortable. Not too hot, not too cold. I'm guessing this is, because the hot air that develops right below the burning hot zinc, is rising up to the highest point of the roof, and, as there is no top yet, escaping freely to the outside. I'm guessing, once the caballette is in place, the air will no longer leave so easily, and it will get a bit hotter. When I mentioned my concern to Sergio he confirmed: once the caballette is in place, it won't be so nice and cool anymore on the terrace!

Last night I had another one of these great ideas...

If, instead of screwing the caballette directly onto the zinc, I screw pieces of cariola onto the zinc, and the caballette ontop of these cariola pieces, there will be holes, through which the hot air can escape. And, since the caballette is 60cm (2ft) wide, the overhang of the caballette over the zinc will still be wide enough in relation of the 7 or 10 cm height of the cariolas, that rain won't be able to enter.
To do this, however, it requires to cut about 40 pieces of cariolas, and drill 2 or 3 holes into each of them to attach them onto the zinc. That takes time. And one person on a Sunday morning is not going to be able to accomplish this...

So, I'm hoping the gap on top is not going to cause too much problems, and we'll be able to do the right thing when we get back here...

And, I guess, I'll be adding another "The roof - day X" post by then...

The roof - day 5

So, yesterday we ended the day with the roof almost finished. 20cm short, due to the new zinc being narrower than the original, and 4 2.1m pieces missing to complete the last four runs. I was really frustrated and pissed.

But, like so many times before, over night I got an idea! First thing in this morning I measured the second set of sheets, the ones that didn't work for the original ones, which forced me to cut those beautiful long sheets into pieces to make up for the missing 2 m on top! Ha! Turns out, their canals are 31 cm! Yeay! They didn't fit the original zinc, but they do fit the new long sheets!

https://drive.google.com/uc?export=view&id=1YF0VXWpcSwy5EGHIcjuxTGxn-zBVCAeZ
Roof almost finished - Weibi, the dog who adopted me last year when I arrived, and two of the five puppies she graced me with in December, are enjoying the cool evening and sunset


And, to compensate for the missing 20cm overall roof width, I had one of these sheets of the second set cut in half lengthwise, making 2 pieces of 4.2 m. Using these as second to last run - with a little more overlap as usual - and then finishing up the roof by using the 4th new long sheet with one more of the 2.1 m long sheets of the second order.

Phew! What a juggling!!!


Finally, the installation of the missing two pieces of facia on either side of the west-slope of the roof, made the day complete!

The roof is finished! 

Well, almost...


Water problems

We tried to fill the new reserve water tank today. It filled well. But, a few minutes later the tank toppled over! foundation not level and/...